
Hello! Tracy here with another Amazing Crafting Products inspiration post! As it nears Halloween my family has a tradition of watching all kinds of Halloween movies for fun and inspiration for decorations, costumes and jewelry. This October is no exception! A common theme of a lot of the family and humor related Halloween movies is Hollywood Glam but with a ghoulish twist. It got me to thinking how could I make some fun little glam Halloween jewelry with the help of Amazing Crafting Products!

Supplies:
- Amazing Clear Cast Resin
- Alumilite Dye - Black
- Alumilite Metallic Powders - Copper, Gold, and Pearlescent
- Alumidust - Deep Red and Deep Purple
- Stampendous Vintage Glitter 5 jar kit, Shaved Ice, Crystal Glitter Multi Ultra Fine, Jewel Glitter Black Ultra Fine, Pastel Glitter Mint Ultra Fine
- Michaels - Celebrate It Halloween 100 piece plastic ring set
- Toothpicks
- Craft Knife or Hand Drill with sander bit
- Craft Scissors or wire cutters
- Paint brush
- Black Acrylic paint
- Liquitex Gloss Varnish
- 40mm x 30mm Cabochon molds OR mold created using Amazing Mold Putty

While for this project I used vintage 40+ year old cabochon molds, you can find newer versions of these molds at your local craft store. Even better however would be to make your own molds using Amazing Mold Putty to cast cabochons or shapes you like to make your own jewelry forms!

Using wire cutters (or sharp crafting scissors), I clipped off
the adjustable ring portion of the Halloween shapes.

I then realized while some of the little plastic shapes were great as is – though some pieces, like the spiders, were too big for the cabochon molds. So I carefully clipped off the excess plastic until each piece fit inside the mold shapes.

I mixed black acrylic paint with some water to make a color wash and applied it with a paint brush to the plastic skull pieces to highlight their detail. I painted on some Liquitex Gloss Varnish and applied metallic powders – Alumilite Metallic Powders - Copper, Gold, and Pearlescent and Stampendous glitters to the plastic pieces. I let these completely dry before the next step.

I mixed up a batch of Amazing Clear Cast Resin following the easy to follow instructions and using a cabochon mold, I started with pouring a thin layer of the resin that filled only the bottom of each mold. I carefully placed the plastic pieces in this layer of resin, making sure the resin pooled around the pieces, "catching" them in place. I let that cure until reaching a tacky set – about a few hours in warm weather.

Next I poured a second thicker layer of Amazing Clear Cast Resin making sure to coat the plastic pieces completely. At this point I added a small amount of glitter to give a little bit of shimmer about each plastic piece. I let that cure to tacky firm.

I poured a third layer of Amazing Clear Cast Resin and added Alumidust in Red and Orange to a few of the cabs and glitter to some of the others. This is where being a bit heavy handed with glitter application isn't a bad thing, it just adds more color and sparkle to the cabochons!

The final layer is a thin layer of Amazing Clear Cast Resin tinted with Black Alumilite Dye, and carefully applied it to the back of each cab and let cure completely. This final dark layer of resin helps the glitter and shapes "pop" more visually.

Using a small hand drill (or craft knife), I removed any uneven edges of the resin pieces. The finished cabochons can easily be placed in a jewelry frame or can be glued onto ribbon to make necklaces and bracelets.

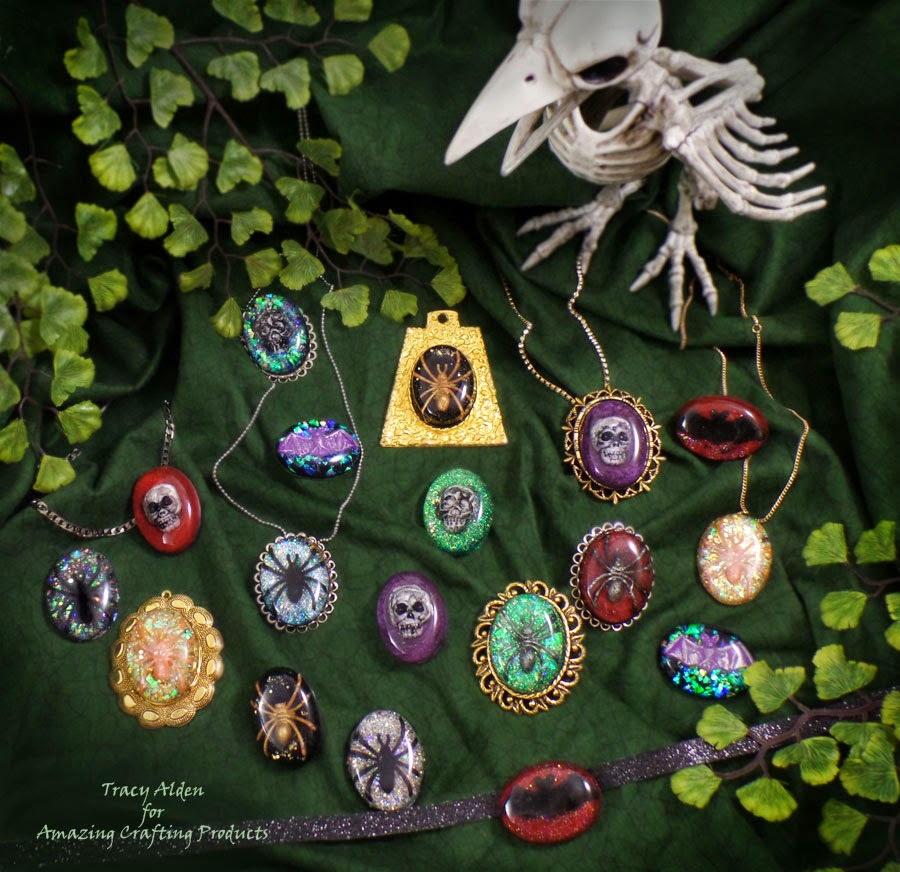
By trying different Halloween charms, glitters and powders, you can
create any number of frightfully fun Halloween GLAM jewelry!
What AMAZING arts and crafts can you create?
Please share them on the user GALLERY on the Amazing Mold Putty Website!
Visit my blog Art Resurrected for more craft tutorials!
Until next time, safe travels! ~ Tracy
• • • • • • • • • • • • • •
Don't forget to subscribe to our blog on the right side bar:
Twitter at AmazingCrafting | Facebook at AmazingMoldPutty | YouTube at AmazingMoldPutty

No comments:
Post a Comment